

You don’t need to become an electrician overnight. What you do need is a clear checklist, realistic cost ranges, and a contractor who handles permits and leaves clean, labeled work. This guide is your practical Guide to Installing a Home EV Charger—written for non-technical homeowners who want a safe, permit-ready result.
If you’re wondering how to install an EV charger safely and efficiently in LA, here’s the short version: most homes are great candidates for a Level 2 EV Charger Installation (240V). A licensed Los Angeles electrician evaluates your panel capacity, plans the shortest code-compliant route, files the permit, installs, and schedules inspection. Typical projects take one working day once the permit is issued; complex routes or panel constraints take longer. If your panel is full, consider load management or a 200 Amp Panel Upgrade in Los Angeles.
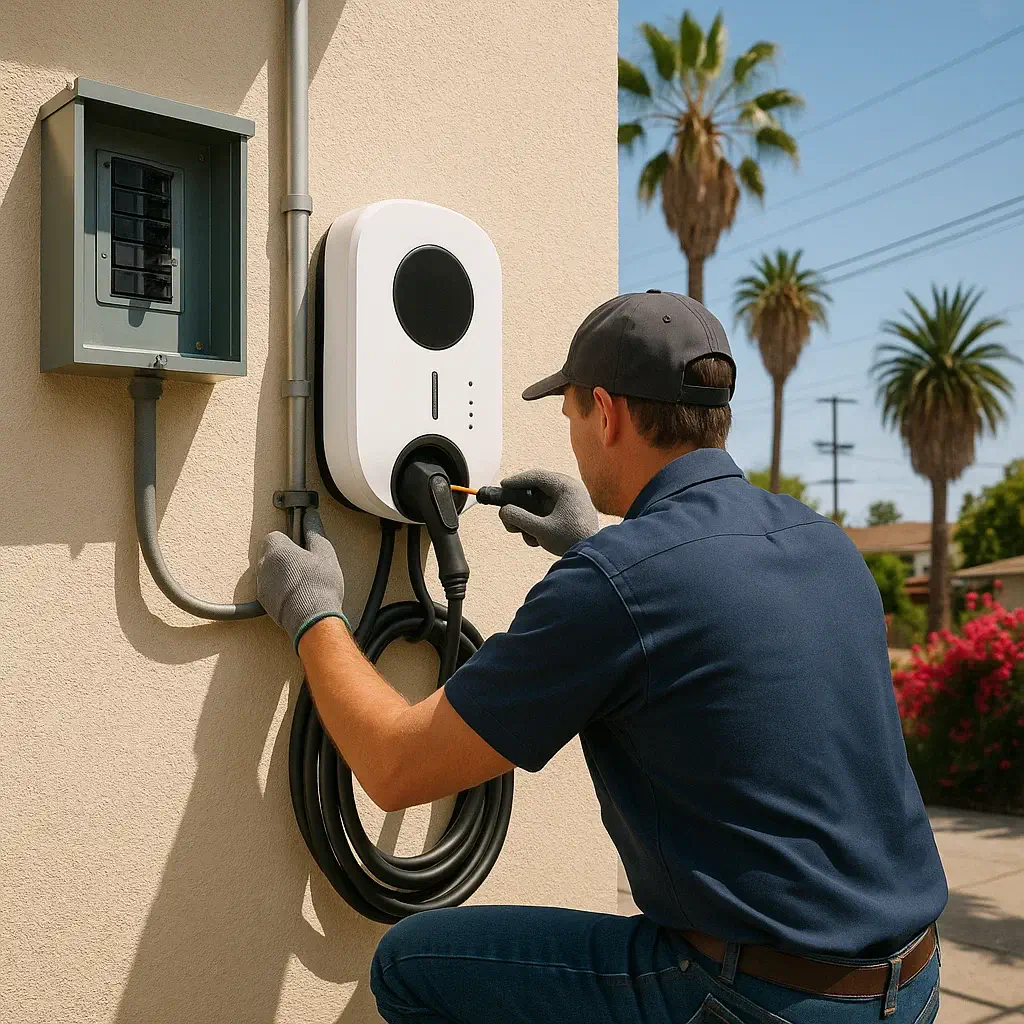
EV Charger Installation Requirements
Before any drilling or wiring, confirm these EV charger installation requirements:
- Dedicated 240V circuit sized for the charger (e.g., 40A or 60A breaker for common 32–48A EVSE).
- Correct wire gauge/conduit & GFCI/grounding where required by code and environment (indoor/outdoor).
- Mounting location with proper clearances for cable reach and connector parking.
- Load calculation to verify panel capacity; if tight, consider smart load management or an upgrade.
- Permit & final inspection (typical in LA) to document a compliant installation.
- Weatherproofing (for outdoor installs): fittings, enclosures, and drip loops to keep moisture out.
Safety note: high-voltage work is not a DIY arena. Always use a licensed Los Angeles electrician. Your insurance and home resale both prefer permitted, inspected work.
Ready to Install a Home EV Charger in Los Angeles?
Get a permit-ready plan with accurate load calcs, clean routing, and inspection support—so your Level 2 charger works flawlessly from day one.
How to Install an EV Charger at Home (High-Level Steps)
This is the homeowner’s view of how to install an EV charger at home—the professional handles the technical execution.
- Assessment & Photos
Take clear photos of your main panel (inside with breakers visible, and outside), plus your parking spot. Note approximate distance and any obstacles. - Load Calculation & Routing Plan
Your contractor calculates available amperage and proposes a circuit size and route (attic/crawlspace vs. surface EMT outdoors). If the panel is at capacity, you’ll discuss load-management options vs. electrical panel upgrade Los Angeles. - Permit Filing
In LA, simple residential EV circuits typically use an express permit. Your contractor files and receives the permit number prior to install day. - Install Day
- Set the charger height and final position.
- Run and secure the conduit/wire; land conductors on a dedicated breaker; label.
- Program the charger amperage to match the circuit; test operation.
- Patch/paint (if included), tidy, and review owner settings.
- Inspection
The contractor or homeowner meets the inspector. A clean, labeled, code-compliant job passes quickly.
Choosing the Right Equipment (and Amperage)
- Level 1 (120V): Slow trickle charging; a backup plan, not a daily solution.
- Level 2 (240V): The sweet spot for most LA homes; full overnight charging at 32–48A.
- Hardwired vs. Plug-In: Hardwired is cleaner outdoors and supports higher amperage; plug-in can be fine when a properly protected NEMA 14-50 already exists.
- Two EVs? Consider dual units with load sharing or a larger circuit strategy to future-proof.
Typical LA Scenarios & What Changes Cost
This section helps translate generic guidance into Los Angeles realities:
- Short run, attached garage (20–30 ft, indoor): fast, tidy, lowest labor.
- Long interior run (attic/crawl across rooms): more labor/time.
- Outdoor run (exterior EMT, weatherproofing): fittings and sealing add cost.
- Detached garage with trenching: trench depth/surface restoration drives price.
- Condos/HOA: approvals, meter rooms, and deeded stall logistics add coordination time.
Curious about actual numbers? See How Much Does It Cost to Install an EV Charger in Los Angeles? for live ranges and incentive notes.
Do I Need a Panel Upgrade?
Not always. Many homes with 100–150A services still support a Level 2 EV Charger Installation using correct load calculations and smart scheduling. Consider a 200 Amp Panel Upgrade in Los Angeles if you want:
- 48A charging plus heavy simultaneous loads (range, dryer, A/C, spa), or
- room for a second EV, solar/battery, or electric appliances down the road.
Ask your contractor for two quotes—with and without the upgrade—so you can compare total cost vs. convenience.
Timeline You Can Expect
- Site check & estimate: 1–3 days (often virtual from photos).
- Permit issuance: usually quick for standard residential EV circuits.
- Install: same day for straightforward routes; add time for long runs, trenching, or panel work.
- Inspection: generally within a few business days, depending on scheduling.
Mistakes to Avoid (Experience-Based)
- Skipping the permit to “save time”: bites you at resale/insurance and risks unsafe work.
- Under-sizing the circuit for the charger’s continuous load: causes nuisance tripping.
- Ignoring outdoor weatherproofing: invites moisture intrusion and failed inspections.
- Overlong, visible surface runs when a shorter attic route was possible: plan first, drill later.
Quick Buyer’s Checklist
- Desired charger amperage (32A? 40A? 48A?)
- Distance from panel to parking (ft)
- Indoor vs. outdoor mounting
- Single EV vs. two (load sharing?)
- Photo set: panel (open), route, parking spot
- Ask for a quote that includes permit, materials, and inspection
How to install an EV charger without headaches: confirm requirements, plan the route, verify capacity, and handle permits properly. For most homeowners, how to install an EV charger at home boils down to a well-planned Level 2 EV Charger Installation that passes inspection the first time and charges reliably every night. If you want a clear, itemized plan from quote to inspection, tik electric—your trusted Los Angeles electrician—will map the route, size the circuit, and deliver neat, code-compliant work. When you’re ready, send panel photos and cross-streets for a fast, site-verified estimate.
For Los Angeles customers, LADWP’s EV charger installation guidance explains the typical installation and permit/inspection flow.
Tik Electric installs Level 2 home chargers across LA every week—photos reviewed, load calcs done, permits pulled, and neat conduit runs that pass inspection the first time. Send over a few panel and driveway photos with your cross-streets, and we’ll map the route, size the circuit, and give you a straightforward quote so you can plug in at home every night without the guesswork.
FAQ (Direct Answers)
Yes for most single-family homes, subject to code and HOA rules if applicable. Condos typically allow it with proper approvals and a documented route.
Match the charger setting to your driving and panel capacity. 40A on a 50A circuit suits many drivers; 48A on a 60A circuit is great if capacity allows.
Hardwired is preferred outdoors and for higher amperage. Plug-in can be fine when a properly protected NEMA 14-50 already exists and suits your needs.
Charging adds usage, but off-peak schedules and right-sizing amperage keep bills predictable.
Load management (scheduling or dual-charger sharing) often avoids upgrades. If you run many big loads at once, discuss a panel upgrade.
Leave a Reply